Configuring Quick Pay
Quick Pay allows users to make a payment without logging into the system. Two steps are required to configure this functionality:
-
Create a web page using the Quick Pay Purchase web content.
-
Enable Quick Pay in the Configurations App.
Once quick pay is configured, visitors to the Quick Pay web page can submit a payment using a quick pay code OR by entering the order/invoice number they wish to pay.
Creating the Quick Pay Web Page
-
Navigate to the Web Sites App > Web Sites > Edit.
-
Click the New Page button.
-
In the newly created page, configure necessary Page Settings and Page Visibility, as normal for your site.
-
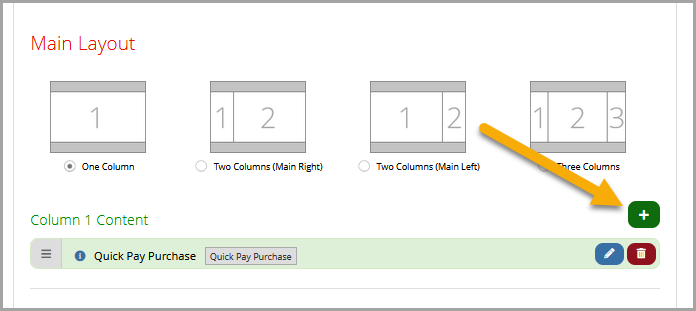
In the Page Content tab > Main Layout section, click the Add button to add Quick Pay Purchase web content to the page.
-
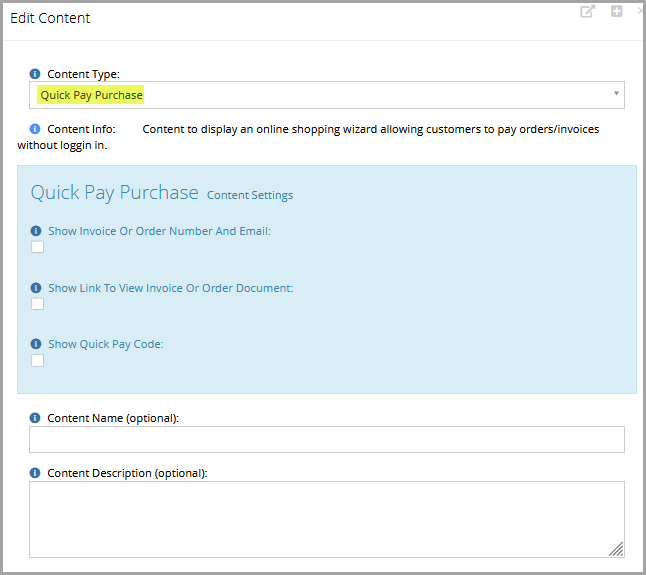
Configure the Quick Pay Purchase web content. For more information, see Web Content - Quick Pay Purchase.
-
Save and Publish the page.
Enabling Quick Pay System-Wide
-
Navigate to the Configuration App > Settings > Shopping section.
-
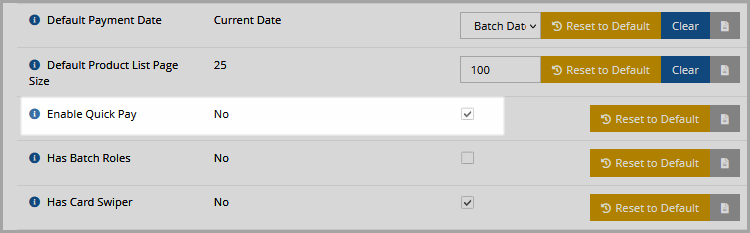
Locate and enable the Enable Quick Pay setting.
-
Save changes.
When Quick Pay is enabled, orders and invoices will display a quick pay link, as well as a quick pay code.
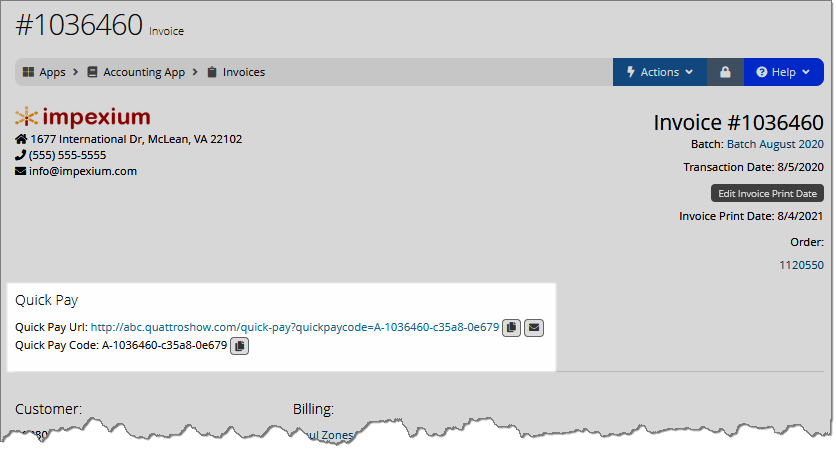
Tip: In the Invoice pictured above, note the Quick Pay URL—the copy and email icons allow staff to quickly share a link to pay that invoice without logging in. The Quick Pay Code alone can also be copied and shared with an anonymous payer.
Note: There are numerous other configuration settings related to the appearance of Quick Pay, including messaging appearing during the process. For details on these other settings, see Shopping Configuration Settings - Quick Pay.
For more on using Quick Pay once it is configured, please see Using Quick Pay.